Isn't this little "S"quirel so cute???!!! This little guy if from Eureka Stamps, and is called Lg. Nutty Squirrel. He is also available in a smaller stamp. Well, I inked him up, and colored him with watercolor crayons. Then I fussy cut him out layered onto the green "S"wirly PP from Imaginisce. Next I used some of PP from the same line to cut some "S"quares, and layered them. I stamped the sentiment, "Oh Nuts" onto the red "S"quare. Then I used a ribbon "S"lide, which I have had, and never touched one of these in my life...lol. I "S"lid that onto some ribbon from Maya Road, and layered along the bottom. Last I added some "S"tickles to the acorn tops.
Gotta love some "S"parkle! Well now it is your turn. First, head on over to the Creative Belli Blog, and see what the other ladies have come up with for your inspiration. Then grab your "S" embellishments, and play along. Can't wait to see what you come up with!


 Isn't this just adorable???!!! So much you can do with all these balloon images too. For this one, I stamped the images and colored with watercolor crayons. Then I fussy cut them out. Next, I used some Echo Park PP for my background, and layered the girl onto that. I wanted it to look like she was floating in the air. For the balloon, I used a pop-dot, and some pink fibers. I slipped the fiber under the girls hand to make it look like she was holding the balloon. It is hard to see in the photos, but I added some Smootch to the balloon to make it look like a Mylar balloon. Last, I added the sticker sentiment. A very simple but fun card. Be sure to stop by the
 Aren't they so pretty????!!! I painted the base coat, and let the girls go to town with creating fingerprint flowers....well at least they were supposed to be making fingerprint flowers. As you can see...we got a few other "things" too...lol. Here are a couple "in-progress" shots...
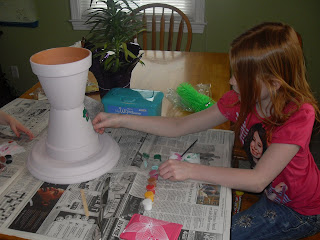 It is all about the process...lol. They did love painting them. Now we will see what the grandmas think. Although, because of the business of the past week and yesterday, I never got them sealed. My DH bought the sealer for me, but we didn't get a chance to do it. So I will be giving them their gifts and taking it right back....lol.
  I made some little gift enclosure cards. I used the

 As you can see, they are all a little different. The base and PP are all the same, but the images are all colored a little different. I also did the glitter different on each, and the scalloped part different. The sentiments are either rub-ons or stickers.
  So I went with a bit of a "non-traditional" rose color. For some reason I loved the way the orange roses looked. I colored them with 3 different shades of orange makers, and 2 shades of green for the leaves. Then I fussy cut only around the outside, and layered onto the PP from Imaginisce. I used the Happy Anniversary image from the QKR Stampede set called


 She used this fun Watermelon fruity drink image from
  She also used one of the