On the 4th blog of Christmas my true love gave to me... okay so you probably don't really want me to sing, but it was a fun thought...lol WELCOME WELCOME to the QKR Stampede "12 Blogs of Christmas" blog hop! If you are joining me from
Carol's blog, then you are right on track. If you just started here on my blog, then you will want to head back to the
QKR Stampede blog, and start from the top. You don't want to miss any of the "12 Blogs of Christmas". So if you are right on track then let us continue! I am so excited about this blog hop, why???? Well, I love Christmas! Although I am freaking out a little that it is a little over a month away, but still I love it...lol. Christmas is always such a magical time in our house. I have 3 little girls that just love the whole holiday thing. Well, I should stop rambling, and show you my projects. I made 2 for this hop. My first project is an altered item. I was at a local dime store called Viddler's a few weeks ago with my mom. I saw this bell, and had to have it. I wanted to "fix" it as I like to say. I have never stamped on metal before, so I thought it would be fun.

I thought it turned out pretty well. I stamped the little
Reindeer Gift image onto the bell using Staz-on ink. I actually stamped it on both sides, but the first side "slipped" a little, so I won't show you that side...lol. To color it, I purchased some Sharpie paint markers. The colors are a lot more limited then other choices, but they had what I needed for this. I also added some red stickles to his nose, and green to the ribbon on the gift. Now I may need to hide this thing before too long...my girls keep ringing it, and it is very "cowbell" loud! ha ha.
My next project is a little homemade "Christmas List" note pad.

A couple years ago I purchased (well my mom purchased for me) a binding system. It is not a fancy one, but it does the job, and I like it! Anyway, I started with 2 pieces of white CS, and layered some SEI PP onto those. For the middle, I used some pieces of loose leaf paper the I trimmed up.

On the front I used some scraps of white CS and hand wrote the sentiments on it. I then used the
TREE image from QKR Stampede. I stamped it onto white CS, and colored it with watercolor crayons. I detail trimmed it, and attached it to the front of the note pad. Then I used my i-Rock at add some little heat set gems to be ornaments. I thought this would be a handy little pad to stick in my purse for Christmas shopping.
Well, it is time you head to the 5th Blog of Christmas!
KRISTINE'S BLOG!!!
Remember if at any point during the hop you get "lost" just head on back to the QKR Stampede blog for a complete list of the 12 blogs of Christmas! ENJOY!!!!
This is also for the following Challenge:
Simon Says Challenge - Sparkle (the bell and tree both have lots of sparkle)
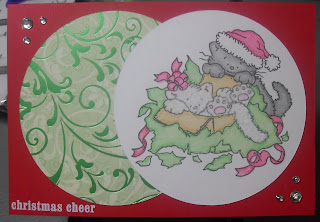 So I started with a Red card base. I used some PP from SEI for the first circle. The image I used is one I have had for probably about 2 years. I don't mean I had the stamp, I mean I had this image stamped off...lol. A fellow stamping friend stamped this one off for me a few years ago, and I just never used it. So I colored it with colored pencils and Gamsol. I added some fun fur to the white kitty.
  Next I added some Rhinestones to the corners, and a Rub-on for my sentiment. The Rub-on is from SU, and I have had those for a couple years too. So now it is your turn! Pull out some "R" embellishments, and then head on over to the Creative Belli Challenge and show us your work! Don't forget to stop by and see all the wonderful inspiration from the other Belli girls!
 Not too bad right? I plan on heading downstairs today to get some more done. I guess I was all about starting and not finishing things this weekend. I also made these...
 These are for teacher gifts this year. Oh, and I wrapped ribbon around the containers these are going on too.
 So these are supposed to be golf balls. My DD is going to have a mini-golf party. I cut the circle cards with my Cricut. Then I ran the front through the cuttlebug, but use the embossing folder "upside down". That way there would be indents and not bumps. They are very simple.
  Sorry the photos are NOT the greatest today. The weather is yucky here, so I can't get the right lighting. It is way to windy and rainy outside to try to take them out there. Well, I made 30 of these total. As you can see, there are 3 different colors for these cards. Here are close ups of each one.

 I ran each CS base through the Cuttlebug, then attached the folded flowers. I then used the
 So this "panoramic" view thingy is my new favorite technique. The key is to remember to take the right photo views when you take the pictures. I learned this technique back in May at the CKC convention. There is a company that actually sells papers to help line up your photos and everything. BUT, I didn't have those, so this is what I got.
  They aren't perfect, but I thought they still looked pretty cool. This one is actually 2 different photos. I made one the other day that was a combination of 3 photos. I just think it gives the coolest effect on a page when you do this. The "secret" is to make sure you take the photo combination you need from the same exact spot. When I took mine, I stood in one spot and just slightly turned my body to take the 2nd photo. DON'T move your feet!
  As you can see, I used iron on transfer paper, and printed the words. After ironing on the words, I added batting to each one, and sewed it over the hanger. Then comes the fun part! The kids get to create a turkey on the banner. I had my DD do her banner ahead as an example.
  Isn't it adorable!!!! I am very pleased with the finished product.