Sunday, February 28, 2010

Fun Saturday!

So yesterday I had to joy of attending a crop for charity. And let me say...they raised a LOT of money for a great cause! The crop was called "A Crop to Remember", and was held at My Happy Place Scrapbooking Studio. It was all to benefit Alzheimer's, and they raised over $3000! I went and had 12 hours of ME TIME, which is something us moms don't get a lot of. With your donation to get in, you got a goodie bag full of great stuff, as well as a door prize entry. There was also a 50/50 drawing and a Chinese auction. I won a couple prizes too! Pretty much everything including a lot of the food was donated, so all the money raised went directly to the WNY Alzheimer's Association. So proud of the girls that put the whole event together...what an amazing crop! I took a couple photos to share with you.

Some of the amazing prize baskets...they were all donated!


Some of the girls I spent my day with.


Thanks for stopping by!

Thursday, February 25, 2010

A square and a bear!

Hello there! I have two cards for you today. The first is for the Sweet Stop Challenge this week. I just loved this sketch, however it took me forever to come up with how I wanted to do it...lol. My mom asked me the other day if I could make a retirement card for a friend of hers. So I decided to use the Sweet Stop Sketch for that.
I used some new paper for the background. I recently purchased a "mystery box", and this paper was one of the many things in it. The paper is from My Mind's Eye. I then used a scallop square punch, and punched out some purple CS. There is the slightest amount of purple in the background paper, so I wanted to pull that out. I then added some flowers, buttons, and sticky butterflies that I covered in glitter. The inside sentiment and outside are both from the same SU Congratulations set. The inside has the retirement wishes by the way...lol.

My second card I made for this weeks Cupcake Craft Challenge. The challenge this week is "Friends"...make a card showing friendship. WOW...do I need this this week. It has been a very stressful few weeks in our house, and I really could use a friend to chat with. I was so thankful to have that this morning too! My dear friend Kelly was there for me again...and put me straight...lol. I needed that though. Anyway...here is the card I came up with.I used the bears from one of the new TAC sets. (Bountiful Bears) I colored it with watercolor crayons, and cut it out. I layered it onto some dark green CS. The PP is from TAC also. The sentiment is from the TAC set Beary Much.

Well that is all for now. Thanks for stopping by!

Wednesday, February 24, 2010

Guest Designer mid-challenge Inspiration

So last week I was honored to be the guest designer for the Creative Belli Challenge. Well I am honored again this week to post some mid-challenge inspiration. In case you missed the original post last Wednesday, the challenge is to use butterflies or dragonflies on your project. The twist with this challenge blog is to use items you either haven't touched in awhile, or stuff you have laying around. You know we all have it! How many times have you gone to the store and purchased papers, stamps, or embellishments that you just HAD to have, and never touch them once you get home? I do it all the time...lol. Well my card for this mid-challenge inspiration uses a few of those kind of purchases.
The stamp I used for this card is seriously 13 years old! I purchased this when I first started card making during college and high school. I pulled it out the other day, and thought this would be perfect for this challenge. I stamped the image and colored it with watercolor crayons...which I also haven't used in awhile either. I trimmed it, and rounded the corners. I then added some butterfly brads...which I have had for a few years now...lol. I layered the image onto some PP from PaperTrey, which I purchased this past summer at CHA in Orlando, and really never use...but I HAD to have it! The sentiment is from TAC, which I stamped on white CS, and again rounded the corners. You can see I rounded the corners on the card base and PP too. Well that is it for my card. There is still time to play along with the Creative Belli Blog this week. Be sure to stop by for some great projects created by the design team, and don't forget to link your card or project too!

Monday, February 22, 2010

Mid-year back to school card

My MOPS group is doing a service project this week at our meeting, and I was asked to help. We are making card kits for kids who have family overseas/military families. The kits include 8 cards of varies occasions. I was asked to come up with a holiday card and a back to school card. The holiday card I used a card that I had already precut all the supplies for a make-and-take at a show I did in November, so that was easy. The school card however was a big struggle for me. I don't really own any stamps that fit the bill for this one. I tried a couple sets that I do have, but I didn't like the way they turned out. So I searched for digi images. Well I ended up with this.
I found a friend that had an old SU school themed set. Not sure the exact name, since it isn't my set, but I used some of the stamps from that to make the background paper. I stamped randomly on some red CS for that. Next I used the school bus from that set, and colored it with marker. The sentiment is from a digi set I purchased from Whimsie Doodles. The set also comes with the cutest little bears with backpacks! The lined paper in the middle is from a set of papers I purchased at CHA this past summer. I believe it is Nikki Sivils papers. I hand wrote the ABC's and 123's on there. I thought all and all it came out pretty cute, and will be simple for the non-crafty moms at MOPS to put together...lol.

Friday, February 19, 2010

Thinking of Spring

Wow...what a day! Tonight is my chocolate party...what more could a girl ask for????!!!! Then the Fed-Ex man showed up at my door with a box today. I was slightly confused since I didn't remember ordering anything from Amazon, but it was addressed to me. So I opened it. Inside I found a packing slip with the follow "note" printed on the bottom. Jessica, Thank you for being the best mom and the best wife ever! And in the box...a brand new Netbook!!!! Now I can have my own personal computer in my stamproom to access all the blogs I like to go to for inspiration while I stamp! I am so excited!
Well, I did take some time to make a couple projects today. I am going to share one with you now, and you will see the other one next week...I promise =). I have been thinking spring lately, so I decided to make a cute spring card. Recently my girls and I were looking at a magazine that had a photo of some cherry blossoms. So I was inspired to make this card. I used a SU set to make this. I stamped the tree onto the CS, and sponged the blue and green around it. I stamped the flowers in light pink, and rolled the edges of the stamp in a darker pink. I then took the tedious task of cutting all 10 flowers out in detail...haha. I used foam tape to put them on the tree so it would have some dimension. I stamped 3 little blue birds, added some cotton candy stickles to the center of each blossom, and the yellow paper flowers on the grass. That is all for now. I hope this brought some happy spring thoughts to you as well.

A chance to win...

I was doing some blog hopping this morning...as I do every morning. I love seeing what others have to share. It really helps with the idea jar in my brain...lol. Well I found this awesome giveaway from MELISSA. Check out this great candy! Melissa also has some great projects to share too. Hope to be back soon with some projects of my own. I have 2 started already in my stamproom, just have been busy cleaning the house. I am hosting a Dove Chocolate party tonight. I really just want to see what it is all about, and don't really care if people buy or not. I will try to remember to let you know how it goes. I believe they are a newer home party company, and I do love home parties...lol. Have a great day!

Thursday, February 18, 2010

Where I would LOVE to be right now... SSS43

What a week...I had big plans for all sorts of play dates, and as of right now we have had absolutely NONE! I need to at least be thankful my middle daughter isn't missing school as a result of her sickness, I just feel bad the play dates aren't happening. Well, since I am stuck at home, and have ample amounts of time to play this week, I was able to get the Sweet Stop sketch for this week done. Here is what I came up with.

OHHHHHH the beach...I would so love to be there! I just got this stamp set from the UPS man on Monday. I usually wouldn't pick a set like this, but for some reason I kept coming back to this one. The set is called On the Beach from The Angel Company. I used the shells and starfish stamps to create the background paper. I stamped the sentiment onto brown "sandy colored" CS. All the solid CS on this card are papers from Co ordinations..so I was able to easily sand the CS to give it a different look. I added some brads, and some twill ribbon. I stamped the little spiral shell and added that in place of the flower on the original Sketch.

Next I wanted to share this butterfly with you. Yesterday I posted the grunge flower I made using my I-top brad maker. Here is the silk flower butterfly.

I used 2 large silk flowers, and the center is an I-top brad I made using some TAC PP. For the "body" I used some ribbon wire, which I curled at the top. HERE is the link to the tutorial from Imaginisce's blog...where I got this idea from.

Thanks for stopping by!

Wednesday, February 17, 2010

My attempt at a Grunge Flower

Recently, a fellow crafter/friend and I were discussing "tricks" we wanted to try. I recently purchased an I-top....which if you haven't noticed...I LOVE, so I have been trying to find projects to use it with. I looked at a link Kristie showed me with the grunge flowers, and thought this would be a great way to use my I-top. Here is what I came up with.
I used 3 different shades of purple CS, cut them out using a layered flower sizzix big die. I ink distressed the edges, and curled them up. The brad in the center is made using some DSP from SU that I have had for at least 2 years now...lol. I once purchased this paper to use as party favors for my oldest daughter's b-day, and just never needed all of it. I think I still have a sealed pack...pretty bad I know...since I keep buying more paper...lol. Well I just thought I would share this attempt with you. I also made a butterfly using silk flowers and the I-top brad...I will try to post that later this week. Thanks for stopping by!

Twinkle Twinkle Little Butterfly...

Happy Wednesday! Hopefully this posts correctly...I have only done scheduled posts a couple times. Well, today I have the honor of being a guest designer this week for one of my favorite blogs...The Creative Belli Blog. I was so excited when Chris and Robin asked me to be a part of the challenge this week. The challenge this week is to use butterflies or dragonflies on your card/project. Remember, the fun part of the Creative Belli Blog is to use things you already have, or things you haven't touched in a long time. Well, here is what I came up with.
I started with a yellow CS base. I added the background paper, which has pretty yellow butterflies. The PP is from Basic Grey (Urban Prairie), and I purchased it forever and a day ago...lol. I was shopping at my LSS one day and the pad of paper was on the counter, and of course I thought it was so pretty and I just had to have it...and well...I am sure you have all done this too. So the paper has been in my stamp room FOREVER, and I just never used it. So what a more perfect time to use it then for this challenge. The main image is from the TAC set butterfly swirls. I stamped the image in old olive onto white CS. I restamped the butterfly 2 more times so I could layer the butterfly.

Next I wanted to color in the image using some of the colors in the background paper, but I also wanted to use a new technique I learned recently. I will try my best to explain the "how-to". Using a gloss finished ceramic tile, I pressed some ink from an ink pad onto the tile. Then, add a drop or two of liquid pearl. Using a mister bottle, spray the ink/liquid pearl combo and mix, to make it like a watercolor paint. I then used a fine tip paint brush to paint on the ink. Because the liquid pearl is mixed in, it gives the paint a shimmer look. The effect is similar to using twinkling H2Os, but I think it has a lot more sparkle to it. I used this to paint the butterfly, and some of the accents on the flourishes. I wanted some sparkle on the background too, so again using liquid pearl...I put a few drops into a mister bottle. Fill the bottle with water, and shake vigorously. I then sprayed a light mist over the background. The CS will be wet, but dries pretty quick, or you could use your heat tool to dry it quicker. How cool are these tricks???!!! Just another way to use some of those liquid pearls. Both of these techniques I learned at my LSS's Hero Arts release party back in December. Here is a close up so you can see some of the sparkle.That is all for now. Be sure to stop by the Creative Belli Blog to check out the other samples from the awesome design team this week.

Jessica

Monday, February 15, 2010

Something SIMPLE to smile about...

Hope everyone had a great weekend. We have Olympic fever in our house. Between the weekend, and the week off of school, we figure it is okay to let the girls stay up to watch some of the festivities. They really enjoyed the opening ceremonies...which we DVRed and watched the next day. So far they are just fascinated by all the events.
Well I have a quick SIMPLE card to show you today. I made this for this weeks Cupcake Craft Challenge, which is Keep it Simple. As far as how to keep it simple, they kinda left it pretty open, but did mention not adding all the embellishments. So here is what I came up with.

I decided no glitter, no brads, no nothing extra. This was tough...I do love embellishments. I created the little scene first. I used some of the images from TAC Brighten girl and TAC Brighten Kitty sets...which are part of the current stamp promotion. I did some masking, and colored the image with markers. I sponged the background in blue to look like the sky. I had masked off the area for the sun, then sponged that in with yellow. I layered the image onto yellow CS, and then some PP from TAC Tutti Frutti collection. The sentiment is from TAC Wonder and Joy set. So that is it...no glitter, no stickles, no ribbon....sooooo hard for me...lol.

Thanks for stopping by, have a great day!

Saturday, February 13, 2010

Princess Birthday

Happy Valentine's Weekend! What a long week it has been. On Monday I mentioned my oldest daughter was sick, and I was going to take her to the doctor. Turns out she had Scarlet Fever...which is really worst then it sounds. On Tuesday my youngest started showing symptoms. We took her to the doctor, and she was also given the same diagnoses. Thankfully the medicine (the pink stuff as we call it here) worked very quickly in helping the throats feel better. So far we have kept the illness away from my middle daughter...KNOCK ON WOOD! Thanks for those who expressed concern.
Well, my middle daughter received an invite to a b-day party tomorrow. So I made a card, and wanted to share it with you. I made a stop at my LSS yesterday and purchased this stamp. I have seen them online before, and just loved them. So when I saw my LSS had ordered some at CHA this year, I was soooo excited! Here is the card.
This princess image is just ADORABLE!!!! This is the Princess Anya image from the Greeting Farm company. I stamped her and colored her hair and crown with marker. I paper pieced the dress with pp from TAC. The background paper is also from TAC, both are from the "Uptown Girl" collection. The sentiment is from SU. I ink distressed the edges of both Anya and the sentiment with melon mambo ink. Last, I added some glitter and stickles to Anya's dress, crown, and wand. That is all for now. Thanks for stopping by.

Monday, February 8, 2010

A Bleached Bouquet

Happy Monday! Well, the weekend only brought sickness to my house. My oldest is home from school today due to illness...I am thinking it is strep, but we have a 1pm Dr. appointment to confirm what it is or isn't. So, being stuck at home, I was able to go down and make a quick and simple card. This card is for 2 challenges this week. First is the Cupcake Craft Challenge...which is "Red & White All Over". The second is for my LSS's blog, Buffalo Stamps & Stuff, "A bleach job". Here is what I came up with.
I first stamped the various circles with versamark and embossed in clear EP, on red CS. The instead of painting on the bleach as Sue did on the BSS blog, I used bleach in a mister bottle. It gives a pretty neat "stone washed jeans" look. I then used various circle punches to punch out the circles. Then I sat and stared at the circles and white CS base and was ready to give up when my 7 year old said..."I know what you can do mom!". So the flowers in a vase was totally her idea! I used foam tape to add some dimension, and she drew the stems on. I used white CS, and cut a vase out, which I stippled 3 different shades of red onto. I added some red ribbon, and a little red tag that I stamped "for you" onto.
Very simple, but still a cute card. That is all for now...I am off to the doctor soon with my DD...hope she can survive the giant q-tip down the throat test....I HATE that test!
Thanks for stopping by!
Jessica

Sunday, February 7, 2010

It's Raining, It's Pouring....Happy Umbrella Day!

So, I am a fan of Cardmaker Magazine on Facebook. Today they posted a challenge to create a card for one of the totally bizarre holidays for this week. They included a list and everything. I decided to go with Umbrella Day...which is actually 2/10. I used this weeks Sweet Stop Sketch as my layout, and the challenge from the Creative Belli Blog this week (which is to use ribbon), and here is what I came up with. So...does it look like an umbrella? I was going for that look. I used clear acetate as my base (which was recycled from a GS Cookie mom manual this year), and cut it into a circle. I used kraft CS as the umbrella top. I used ribbon for the "handle". Instead of DP I used an umbrella stamp (from TAC...a retired set called seasonal cuties) on the one side, and stippled green ink on the other side. The main image is from a TAC skunk stamp set. I stamped the image and colored it with markers. I sponged some light blue around the image, and rounded the corners. I cut out some little "raindrops" from blue CS, attached them, and added some blue stickles to them. I used blue stickles for the "dots" next to the image, and added some flower brads.
Thanks for stopping by! And Happy Umbrella Day!
Jessica

Superbowl Brownies gone...RIGHT!

So I had to share this with you. My DH is going to a Superbowl party tonight. I couldn't find a sitter, which I think in the long run was GOD's plan...since my oldest daughter is now sick. Well, I promised to send some brownies to the party for the guys, and things didn't go well. I have this really cool Nordic ware pan shaped like a stadium. So I used 2 box mixes, and filled the pan, baked it...and that is when the problem occurred. You see...I couldn't' get it out of the pan...even after spraying and flouring it. So I ended up with this...
Well, I wasn't about to waste 2 perfectly good boxes of brownie mix, so I needed to come up with another way to use it. So...I took out the good ol' food processor, and send the DH to the store for some cool whip and frozen strawberries. After a little chopping, thawing, mixing, and layering...I came up with this...
AND IS IT EVER GOOD! Plus I used fat free cool whip so it can't be that unhealthy for you. I think when you put brownies in the food processor you chop out some of the calories too...I think...=)

Jessica

Friday, February 5, 2010

Football Weekend

Well the Superbowl is finally here! This is good news...I hate football...so this means I don't have to spend my Sunday listening to it anymore! In honor of the Superbowl, My Happy Place is doing a contest on Facebook. For those who don't know...My Happy Place is a local scrap booking "studio". You can go there and "rent" table space, spread out, and craft your heart out! They also offer classes, birthday parties, & girls' night out. Such a cool place...I just wish I could get there more often. Well the facebook contest was to create a football related project. You could do something involving your favorite team, but since I don't like football, I decided to use the contest to help me use up some PP I had. Here is what I came up with.

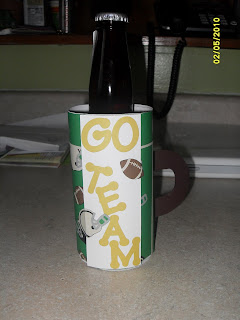
This is my "beer mug". I used the mug pattern from THIS previous post, and just made it taller. I wrapped it with the football themed PP. I used brown CS for the handle. I cut a large white strip of CS and added some CS letters to spell "GO TEAM". I also cut out a helmet and football to add a little detail to the white CS strip. Just a fun project...these would be cute for a boy b-day party sport favor, or a party favor for a football party of some sort. You could fill it with some candies.

My 2nd project tonight is a little Valentine card. The challenge this week on my LSS blog (Buffalo Stamps and Stuff) was to put a heart pocket on your project. I had made a heart pocket card a year of so ago, and totally forgot about this idea.

I used to PP I purchased awhile back at the Target $1 spot. I layered some pink CS on white CS base. I stamped the sentiment from a SU set in black along the top. Then I attached the heart pocket on the corner, and added 4 little hearts to the card also. For the smaller hearts, I stamped and punched them out using a SU stamps and punch. Very simple, but still cute.

That is all for now...I am hoping to finish my scrapbook from our family vacation 2 summers ago this weekend. I am not a scrapper, so this has been totally dragged out...lol. Thanks for stopping by.

Jessica

Tuesday, February 2, 2010

Bear-y Cute Bear-thday

I'm BACCCCKKKK! I have my NEW stamp room all in order, and ready for business. We spent most of Saturday finishing up both my room, and the new arts and crafts room for my daughters. They are just thrilled to have their own space to trash...I mean...craft. It helped clear up some space on my counters and cupboards by taking all their stuff downstairs too. Well today I was able to work on a couple projects...well finish them. I started them yesterday, but ran out of time to finish. I made 2 cards today, for 2 different challenges. Here is the first one.
I made this card for this weeks Mojo Monday Sketch Challenge. It is contest week too! Here is what I came up with.
I used the bears from one TAC's new Serendipity sets (BOUNTIFUL BEARS). The sentiment is from a separate set, but was created to go with this set (T3246 Beary Much). There are some really cute "bear" sentiments in the set. I paper pieced the bow tie using some PP from TAC. I sponged around the scalloped square too. I added a flower, and brad, which I made with my I-top, using the same PP. My 2nd card today I made for this weeks Cupcake Craft Challenge. The challenge this week is Four Legged & Furry, so here is what I came up with.
This card is not smaller then my normal 1/2 sheet of 8 1/2 x 11 cards, but I thought it would be fun to try something different. I stamped and embossed the little kitty in silver, which is my furry four legged friend for this card. Then I colored it using ink pads and aqua painters. I punched him out with a scalloped square, then layered onto a solid purple CS square. I ran the base through the cuttlebug, then used 4 different shade of purple ink and stippled the background. I added some twill ribbon, and a brad. Last, I stamped the sentiment onto the ribbon using staz-on ink.
Well that is all for now. Thanks for stopping by.

Jessica